There’s a special kind of quiet that falls over a room when wool meets barbed steel—focused, tactile, a little addictive. If you’ve ever wanted to turn raw fiber into tiny sculptures, soft ornaments, or colorful patches, needle felting is the most immediate, forgiving way to begin.
This guide will walk you through the basics, from picking needles and wool to finishing a small project you can hold in your hand. I’ll share practical tips, safety reminders, and a few of the mistakes I learned the hard way so you can get to the fun parts faster.
Why needle felting is such a rewarding craft
Needle felting is tactile, low-tech, and surprisingly expressive; it asks only for a small set of tools and a little patience. Unlike spinning or weaving, you don’t need large equipment or complex setups—just wool, needles, and a flat surface to work on.
The technique lets you move directly from idea to object. You can shape balls, animals, botanical forms, or flat appliqués in a matter of hours, and the learning curve is gentle: each stab of the needle changes the shape slightly, giving instant feedback.
What needle felting is and how it works
At its simplest, needle felting is the process of compacting loose wool fibers so they lock together into a solid form. Special needles have tiny barbs along their shafts; when you push the needle into the wool and pull it out, the barbs catch fibers and tangle them together, creating felt.
The process is additive and subtractive: you build volume by adding more fiber and compress it with more stabbing. You can also thin or reshape by pulling fibers away or lightly needling areas you want to tighten.
Because the technique relies on friction and mechanical entanglement rather than heat or glue, needle-felted pieces are durable and soft at the same time. This makes them ideal for toys, ornaments, patches, and mixed-media art.
Essential supplies and tools

Before you begin, gather a handful of basic supplies. You don’t need an entire studio—just a few needles, some wool (roving or batts), a work surface, and an optional multi-needle tool to speed up larger forms.
Below is a compact table that lists the most useful items for beginners, why each is important, and a rough price range so you can budget. Quality varies, so treat the cost ranges as starting points rather than hard rules.
| Tool or material | Purpose | Approximate cost |
|---|---|---|
| Felting needles (assorted sizes) | Sculpting, shaping, detailing | $5–$15 per pack |
| Needle holder / multi-needle tool | Holds multiple needles for faster felting | $10–$40 |
| Wool roving or batts (wool, dyed colors) | Main sculpting material | $3–$12 per ounce |
| Foam block or brush mat | Protects needles and your work surface | $5–$20 |
| Finger guards / thimble | Protects fingers during concentrated stabbing | $3–$10 |
| Embroidery needles, thread, wire | Details, armature, attachments | $1–$10 |
Shop locally if you can: handling needles and wool helps you judge texture and size better than photos can. Many craft stores have sample wool or demo needles you can examine before committing.
Needles explained
Felting needles come in different gauges and with varying numbers and patterns of barbs. Common labels include 36, 38, 40, and so on; lower numbers indicate thicker needles that felt faster and more aggressively. Thicker needles are great for core shaping, while finer needles are better for surface smoothing and delicate details.
There are also specialty needles like star-point or spiral needles; these have different felt textures and can create diverse surface effects. Beginners do well to start with a trio of needles: one coarse (for quick shaping), one medium (for general work), and one fine (for finishing).
Needles are fragile. They bend or break if used sideways or at an angle. Replace them when tips become dull; a blunted needle slows progress and can tear fibers rather than matting them smoothly.
Wool types and how to choose
Wool roving and batts are the core materials. Roving is a long, continuous bundle of fibers; batts are larger sheets often used for backgrounds or bulk. Different breeds of sheep yield wool with varying crimp, softness, and bias toward felting.
Beginner-friendly fibers include Corriedale or Romney for general sculpting because they felt easily and hold shape well. Merino offers a softer, silkier surface but can be trickier to handle for very firm pieces because it compresses more slowly.
Experiment with color and fiber blends. Core wool (cheaper, coarser) is handy for building mass, and a finer outer layer gives a neat finish. Natural fiber blends like wool-silk or wool-nylon add sheen or strength when needed.
Setting up a safe and efficient workspace
Create a small, well-lit area with a flat, stable surface. A kitchen table, a sturdy desk, or a lap tray works well—just make sure the surface won’t be damaged by needles or moisture.
Place your foam mat or brush mat on the work surface to protect both the table and your needles. Keep small items organized in shallow trays so you don’t poke around blindly and accidentally stick yourself.
Good lighting is crucial for detail work. A bright adjustable lamp at eye level prevents eye strain and helps you spot stray fibers and subtle shapes as your piece develops.
Safety and care when working with needles
Needle felting involves repeatedly stabbing thin, sharp needles through wool. The most common injuries are minor punctures, but they hurt and can introduce contaminants; keep your hands safe and your needles clean.
Wear a finger guard on the hand that holds the work, especially when you’re concentrating on small details. If you prefer not to wear guards, slow down and keep the hand holding the wool relaxed and low to the work surface.
Store needles in a secure case and keep them away from children and pets. Sweep your workspace after each session to collect stray fibers and broken needle fragments—those can be hazardous if left on the floor.
Basic techniques: the foundations of form
Mastering a handful of core techniques will take you a long way: the basic stab, shaping into spheres and cylinders, adding and compressing layers, and attaching separate pieces. Each technique builds on the principle of compressing fibers with barbed needles.
The basic stab is done by holding the fiber in place and pushing the needle straight in and out. Keep your wrist relaxed and use short, quick motions at first. Angle or twist only once you understand how the wool responds—tilting too much can break needles.
The stab and shaping simple forms
Start by making a smooth ball: pull off a length of roving, roll it in your hands to approximate a sphere, and then repeatedly stab the top, bottom, and sides evenly. Rotate the piece often so all sides compress uniformly.
For cylinders and ovals, work along the length of the shape to compact fibers. Use a coarse needle to set the core, then switch to finer needles to refine the surface. Make deliberate, evenly spaced stabs to avoid flat spots.
Joining, layering, and building volume
To attach one felted piece to another—say, a head to a body—place the seam where you want the join, apply a small amount of wool as a bridge, and needle through both pieces repeatedly. The fibers will interlock and create a durable connection.
Adding hair, fur, or color accents often involves layering thin wisps of wool and lightly needling them into place. Start with a light tack first, then strengthen the join gradually so you don’t distort the base form.
Creating firm cores and soft surfaces
For sturdy sculptures, build a denser inner core with coarser wool and a coarse needle. After the core holds shape, wrap on a softer, smoother outer layer and finish with a fine needle for a tidy surface. This combination balances durability with a pleasant tactile feel.
If you want an intentionally fuzzy surface, use less surface needling or brush the wool lightly with a pet slicker brush. For clean, crisp edges, compress thoroughly with a fine needle and keep angles sharp by supporting the piece on a firm mat while you work.
Adding fine details
Eyes, noses, little paws, and embroidered accents bring sculptures to life. Use tiny amounts of wool for details and a fine needle to anchor them. For consistent eyes, you can felt small round beads or use glass/plastic eyes and stitch them into place for extra realism.
Wire armatures inside limbs give poseability for figures. Wrap the wire in a thin layer of wool before felting around it to mask the metal and help the outer wool adhere smoothly. Test poses before you finalize the surface, as over-felting can make movement rigid.
Step-by-step beginner projects
Starting with small projects builds confidence and teaches core techniques. The three projects below are chosen because they introduce shaping, attaching pieces, and finishing without overwhelming detail.
Project 1: simple felted ball (practice form and firmness)
- Pull off a 2–3 inch length of roving and roll it between your palms to form a loose ball.
- Place the ball on the foam pad and stab with a coarse needle straight in and out in a controlled rhythm.
- Rotate the ball frequently; compress evenly until the surface firm but still slightly springy.
- Switch to a medium needle and continue refining the shape, filling any dents with small bits of roving and needling them in.
- Finish with a fine needle to smooth the surface, taking care to keep stabs straight and close together.
- Use these balls as bases for animal bodies, ornaments, or stress-relief pockets for your desk.
This exercise teaches even compression and how different needles affect speed and finish. Expect to spend 15–45 minutes depending on desired firmness.
Project 2: flat heart patch (learn layering and surface work)
- Cut or pull a small piece of wool batt and flatten it to the size of a palm.
- Shape the batt into a rough heart with your fingers and place it on the foam pad.
- Use a medium needle to outline the heart and reduce bulk toward the edges with short, careful stabs.
- Add a thin layer of contrasting color on top for decoration and secure it with light needling.
- Finish by smoothing the surface with a fine needle and trimming any stray fibers with small scissors.
- Attach to fabric with sewing or a dab of fabric glue, or use it as a brooch backing by adding a pin.
Flat projects are forgiving and perfect for practicing clean edges and applying thin color layers without shaping a 3-D form.
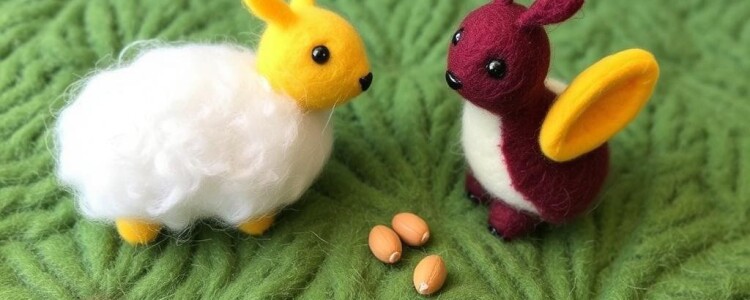
Project 3: tiny felted bird (combine forms and detailing)
- Make a small tear-drop shaped body by compacting roving into a plump oval with a tapered end.
- Create a tiny rounded head and attach it to the thicker end of the body with bridging wool, needling until secure.
- Add a beak by twisting a tiny bit of colored wool into a cone and needle it into place.
- Use a fine needle to add eye hollows; either felt small black beads in place or add tiny dots of black wool.
- Apply wings by needling thin flattened bits of wool to the sides, blending the join for a seamless look.
- Refine the bird’s surface with a fine needle and mount it on a little twig or pin for display.
This project trains your eye for proportion and teaches how to attach small appendages securely. It’s also satisfying because it looks complete in a short session.
Troubleshooting common problems

Felting often hides simple fixes behind frustrating symptoms. A lopsided shape, for instance, usually means uneven needling—rotate the piece frequently and concentrate on the fuller side to rebalance it.
When fibers persistently refuse to felt down, try a coarser needle for more aggressive barbs or add a small core of coarser wool underneath to give the surface something to bind to. If fibers protrude after finishing, a light trim with small scissors or a fabric shaver clears them without damaging the felt.
Broken needles are common. Replace them; attempting to straighten bent needles can cause them to snap unpredictably. Keep a few backup needles in different sizes so a broken bit doesn’t force you to stop mid-project.
Finishing touches and mounting options
Once your piece is shaped and smoothed, finishing techniques make it presentable and durable. For ornaments, consider adding a small loop of thread sewn into a concealed spot so the piece hangs evenly.
For brooches or appliqués, stitch around the edges to secure the felt to a fabric backing or use a lightweight fusible interfacing for stability. When mounting on wood or canvas, glue carefully and clamp until dry to avoid shifting.
Seal delicate surface fibers with a sparse mist of fabric stiffener if you need rigidity. Test the stiffener on a scrap first; some products can darken dye or change texture slightly.
Care, maintenance, and repairing felted items

Needle-felted items are surprisingly tough but benefit from gentle care. Dust them periodically with a soft brush and avoid crushing them under heavy objects. Most felted ornaments handle occasional hand washing in cool water with a gentle detergent, but aggressive agitation may cause additional felting.
To repair a worn or deformed area, add a small amount of matching wool and needle it into place. For holes, stitch through with an embroidery needle and then cover the seam with a thin layer of wool and a bit of needling to disguise the repair.
If color fades over time, you can steam-dye or carefully reapply dyed wool accents rather than attempting to recolor the entire piece, which risks uneven results.
Next steps: expanding your skills and ideas
As you gain confidence, introduce mixed media: incorporate beads, wire, fabric, or small found objects into your pieces. Try felting over forms like styrofoam or wire frames to create large sculptures without enormous time investments.
Experiment with texture by combining different fibers—alpaca and mohair add halo and softness, while synthetics can add brightness and durability. Different breeds of wool behave differently; a sampling of small amounts from a wholesale supplier is a smart way to learn their personalities.
Take on themed projects—a set of holiday ornaments, a series of miniature portraits, or wearable art like felted collars—and challenge yourself with constraints like a single color palette or a fixed size.
Resources: books, online tutorials, and communities
Good tutorials combine clear photos with step-by-step instructions. Look for classes that show hand positions and needle angles rather than only finished photos—those practical details save hours of trial and error.
Local fiber co-ops, guilds, and craft stores often host needle-felting workshops that provide hands-on guidance. Online platforms host myriad video lessons; choose instructors whose pace matches your learning style and who show close-up work.
- Beginner books that explain needle types and step-by-step projects
- Video channels with close-up views of hand positioning
- Community forums and social media groups for feedback and inspiration
Joining a local or online community speeds learning and provides motivation. Post progress photos and ask for targeted advice—many experienced felters are happy to help a newcomer troubleshoot a stubborn seam or suggest a better needle choice.
A short personal note: how I learned and what helped
I remember my first clumsy attempts: a handful of lopsided creatures that looked more like abstract blobs than anything else. What changed everything for me was committing to small, repeated exercises—making twenty tiny balls, then twenty tiny pears, deliberately focusing on rotation and even needling.
Having a mentor helped too. A friend demonstrated grip and taught me to relax my wrist; once I stopped stabbing like I was hammering nails, my speed and precision improved dramatically. Those early lessons stuck and still shape how I teach beginners today.
Creative tips to keep your practice fresh
Set mini-challenges to avoid repeating the same few forms. For one week, make only animals with a single color; the next week, explore textures by blending three different fibers on each piece. Constraints breed creativity.
Keep a small sketchbook for ideas and quick thumbnail sketches of proportions before you begin. Translating a drawn silhouette into felt becomes easier when you’ve sketched the pose and scale beforehand.
Rotate between projects. If you feel stuck on a detail, switch to another piece for a short time—fresh eyes often reveal better solutions. And don’t be afraid to deconstruct a failed piece and reuse the wool for a new attempt; it’s economical and educational.
Quick reference: needle sizes and recommended uses
Below is a simple breakdown you can print or keep near your workspace: it helps you match needle choice to task quickly so you don’t waste time switching blindly.
| Needle size | Use |
|---|---|
| 36–38 (coarse) | Fast core shaping, large volumes, initial compression |
| 40–42 (medium) | General shaping, forming limbs and faces, attaching parts |
| 44–50 (fine) | Surface smoothing, delicate details, finishing touch-ups |
Keep a broken-needle disposal jar and replace needles when points dull. Treat this reference as a guideline—your feel for the wool will ultimately decide which needle you reach for instinctively.
Needle felting rewards attention, iteration, and a willingness to play. Start small, protect your fingers, and give yourself permission to produce imperfect pieces—you’ll learn more from fixing mistakes than from only making things that work the first time. With a handful of needles and some wool, you can build an entire practice that’s portable, affordable, and endlessly adaptable to new ideas.


