There’s a quiet joy in watching fluffy fiber condense into a strand that’s both strong and alive. Spinning your own yarn turns raw material into something practical and personal, and it invites a kind of slow, grateful attention you don’t often find in modern crafts.
This guide walks you through the parts that matter most: choosing fiber, selecting tools, learning the essential techniques, troubleshooting common problems, and finishing yarn so it behaves itself in a sweater or a hat. Whether you’re curious about a drop spindle or considering a wheel, you’ll get practical steps and real-world tips to start making useful, beautiful yarn.
Why spin your own yarn?
Spinning makes craft intimate. When you spin, you are deciding fiber, twist, and thickness; you determine how the yarn will drape, feel, and wear. That control turns mass-produced yarn into a custom ingredient for projects that fit you in ways off-the-shelf yarn never quite will.
Beyond customization, spinning connects you to a long human lineage. It’s a quiet form of making that rewards practice and observation rather than speed. Many spinners find the rhythm calming, a kind of tactile meditation that produces a useful object as a byproduct.
There’s also a pragmatic side: spinning can be economical and sustainable. Little skeins of handspun are perfect for small projects, and you can experiment with fibers you source locally or ethically. For makers who value traceability, spinning lets you follow the story from fleece to finished garment.
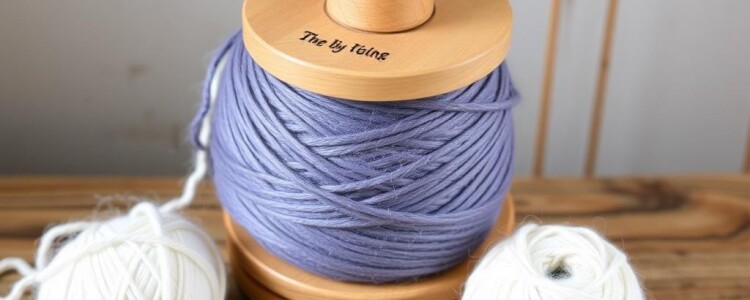
Essential tools: what you really need to begin

You can start with minimal equipment: a spindle, some fiber, and a comfortable chair. That simplicity is part of the appeal; a drop spindle fits in a pocket and costs far less than a wheel, making it an ideal first tool for most beginners.
If you prefer faster production and hands-free spinning, a wheel is worth considering. Modern wheels vary in expense and complexity, and secondhand wheels can be a good entry point if you inspect them carefully for damage and smooth bearings.
Other small items make the work easier: a lazy kate for plying, bobbins for storing singles, carders for preparing fiber, and niddy noddies for skeining. None are strictly required at the outset, but each becomes useful as you progress.
Comparing spindle and wheel
Choosing between a drop spindle and a spinning wheel is both practical and personal. A spindle is portable and forces you to learn drafting and twist control intimately; a wheel is faster and less physically demanding on hands once you’ve learned the basics.
To compare at a glance, consider the following table that highlights key differences and trade-offs so you can match a tool to your goals.
| Feature | Drop spindle | Spinning wheel |
|---|---|---|
| Portability | Very high | Low to medium |
| Speed | Slow | Fast |
| Cost | Low | Moderate to high |
| Learning curve | Steep but simple tools | Steeper setup, easier continuous spinning |
| Style control | Excellent for small-batch experimentation | Excellent for consistent production |
Other accessories you’ll appreciate
A few inexpensive accessories make lessons easier. A small pair of scissors, a tape measure, and a ball winder or niddy noddy will help you measure and finish yarn. A spindle or wheel stand keeps things tidy and accessible between sessions.
Tools that seem frivolous at first—lip balm for chapped fingers, a comfortable footstool, or a lap bowl for your spindle—often become essential because they reduce friction in your practice. Comfort encourages longer, more productive sessions.
Local fiber shops and spinning guilds often loan or rent equipment so you can try before you buy. Take advantage of those options to test different wheel styles or spindle weights and see what fits your hands and rhythm.
Understanding fiber: types and what they do
Fiber choice matters more than most beginners expect, because different materials behave differently when drafted and when spun. Wool is the most forgiving and widely recommended starting fiber, but once you understand basic properties, you can branch out to plant and exotic fibers.
Key characteristics to watch are staple length (the individual fiber length), crimp (natural waviness), micron count (fiber diameter), and luster. These features influence ease of drafting, how much twist the yarn needs, and the final hand of the yarn.
Experimenting with several fiber types early helps you learn how twist and drafting interact. You’ll notice how a woolen-spun yarn traps air and blooms, while a worsted-spun yarn is sleek and strong. Those differences are a big part of the creative fun.
Wool breeds and their personalities
Wool is not a single thing; it’s a family of breeds with distinct temperaments. Merino is fine and soft, excellent for next-to-skin garments but it needs careful handling to avoid breakage. Romney and Corriedale have longer staples and a robust structure that stands up to rougher handling.
For practice, look for medium-fine, well-prepared roving labeled for spinning. These fibers draft predictably, hold twist well, and allow you to learn without the frustration of short, brittle fibers that break or felt too easily.
When you want lofty, insulating yarns, seek high-crimp breeds or Falklands-style fleeces. For a yarn that resists felting and has a smoother surface, worsted preparation of a long-staple wool is your friend.
Plant fibers and others
Plant fibers such as cotton, linen, and hemp behave differently because they are smoother and lack the scales and crimp of wool. Cotton has short staples and demands more careful drafting and often a higher twist to produce a strong yarn.
Linen and hemp produce linen-like yarns with excellent strength and cool drape, but they can be stiff until washed and softened. These fibers reward patience and suit summer garments and home textiles well.
Silk adds luster and strength and blends well with wool to give both sheen and softness. Specialty fibers such as alpaca, yak, and angora bring unique textures and require adapted technique depending on staple length and fiber slipperiness.
Preparing fiber: carding, combing, and pre-drafting

How you prepare fiber determines whether the yarn will be woolen (airy and warm) or worsted (smooth and strong). Carding and combing are the two primary preparation methods, each producing rolags or tops suited to different styles of spinning.
Carders create rolags—soft, randomized rolls of fiber ideal for woolen spinning. Combed tops align fibers parallel for worsted spinning, giving a tighter, shinier yarn that shows stitch definition beautifully in garments.
Pre-drafting is a gentle, quick step that many beginners skip, but it pays off. By gently pulling thin strips from a rolag or top before you spin, you make drafting smoother and reduce the likelihood of lumps and loose spots.
How to card and comb at home
Hand carders are inexpensive and portable tools that let you turn fleece into rolags. The motion is simple: brush small handfuls of fiber across the carding surfaces until the fiber opens, then roll off into a rolag for spinning.
Combs require a bit of technique but produce a top that drafts smoothly for worsted spinning. Short lengths of fiber are loaded onto the comb and then pulled through with the other comb or a flicker, aligning fibers before they are drawn off as a top.
Both tools are forgiving; practice with small amounts until you get a feel for how the fiber behaves and how much force to use. The goal is to open and align fibers without flattening or pulling them apart.
Basic spinning techniques: drafting, treadling, and twist
At its heart, spinning is controlling the ratio between draft (how much fiber you feed) and twist (how much spin you insert). Mastering that balance is the core skill that makes yarn consistent and usable.
Drafting is the act of pulling fibers into a thinner strand, and you will practice controlling the thickness with fingers and hand movements. Twist is imparted by the spindle or wheel; it binds the fibers together and gives the yarn strength.
Beginners typically start with short, controlled drafts and aim for consistent thickness. As confidence grows, longer drafts and varying drafting styles let you produce different textures and yarn weights.
Short draw vs long draw
Short draw keeps fibers aligned and produces a smooth worsted yarn. It uses a controlled hand near the drafting zone, with twist blocked from entering the drafted fibers until they’re at the desired thickness.
Long draw allows twist to enter the drafting zone and traps air for a lofty woolen yarn. It’s less about strict alignment and more about creating a cloud-like structure that will full and bloom after washing.
Both techniques serve purposes; choose short draw for durable, defined yarns and long draw for warm, airy yarns. Practice both to expand your creative palette.
Practical steps for a first yarn
Start with a small, well-prepared rolag and a comfortable chair. Attach your leader to the spindle or bobbin, secure the leader to the spindle’s hook, and begin spinning in a consistent direction to build twist in the leader.
Hold the rolag in one hand and use the other to draft a short amount of fiber, allowing twist to travel up and consolidate the drafted fibers. Wind on the newly formed single and repeat, protecting the twist from being over-twisted by keeping tension gentle.
Keep sessions short to avoid fatigue and inspect your work frequently. When you get a sense of a consistent rhythm, you can extend the length of drafts and experiment with different drafting lengths to vary texture.
Plying: why it’s important and how to do it
Plying combines two or more singles to create a balanced, stable yarn that resists untwisting. Plying direction should be opposite to the single’s spin, and careful tension control prevents distortion or over-twisting during the process.
Many beginners start with two-ply yarn, which gives a round, predictable profile ideal for garments and general use. Three-ply and cable plying methods create different textures and strengths for specialty projects.
Plying also corrects twist imbalance from singles. A balanced ply produces a skein that hangs straight; an unbalanced ply will bias and skew knits, making them curl or drape oddly.
Steps for two-plying on a spindle
Wind two equal-length singles onto separate bobbins or make sure the lengths are manageable on the spindle. Secure the leader for your two-ply on the spindle, and attach the ends of both singles to the leader, being careful of twist directions.
Spin the spindle in the opposite direction to your singles’ twist, controlling tension so the yarn takes up smoothly without snarling. Pause often to let the yarn relax and to check for evenness.
When you reach the end, secure the ply by tying the end to itself and washing the skein to allow the twist to settle. Proper finishing preserves the structure you worked to create.
Yarn weights, wraps per inch, and gauging
Understanding yarn weight helps you plan projects and know how your handspun will behave. Yarn weight ranges from lace to super bulky, and handspun often fits between these categories depending on drafting and twist choices.
A practical way to measure is wraps per inch (WPI): wrap yarn around a ruler without squishing it and count the wraps in a one-inch span. WPI gives a reproducible number you can match to pattern requirements and anticipate gauge.
Remember that handspun can change slightly after washing; always make a swatch, wash it the way you will care for the finished item, and measure gauge post-wash for accurate results.
Estimating twist: TPI and balance
Twist per inch (TPI) influences strength and elasticity. Finer yarns often need more TPI relative to their thickness, while thicker yarns require fewer twists per inch. Balancing twist between singles and ply prevents bias in knitted fabric.
A quick way to experiment: spin several short singles at different twist levels, ply them, and then test break strength and hand. Over time, your eye and hands will learn the right twist for the style you prefer.
Note that fiber type changes ideal TPI; slippery fibers like silk need more twist for strength, while crimped fibers like Merino can achieve cohesion with less twist.
Finishing your yarn: washing, setting twist, and fulling
Finishing turns newly spun yarn into a stable, predictable product. Washing relaxes the fibers and allows twist to even out; gentle agitation and heat often help fibers bloom and settle into their final texture.
To set the twist, skein the yarn loosely, tie it in several places, and wash it in warm water with mild soap or wool wash. Rinse carefully and squeeze out excess water rather than wringing, then hang dry or lay flat depending on the fiber.
Some yarns benefit from fulling: controlled agitation that slightly felts the surface, tightening the yarn and giving it a smoother hand and more loft. Fulling is not for every yarn; test on a small piece before treating an entire skein.
How to wash a handspun skein
Fill a basin with warm water and add a gentle soap. Submerge the skein and let it rest—no vigorous rubbing—so the soap penetrates and the fibers relax. Work in small sections to release trapped air and encourage even settling.
Rinse in water of the same temperature to avoid shocking the fibers. Squeeze slowly, roll the skein in a towel to remove excess moisture, and dry according to fiber recommendations, either flat or weighted to set twist tension.
When the skein is dry, give it a final light steam or soak to settle the twist if needed. Your yarn will look and feel different after finishing; that change is part of the magic of handspun.
Troubleshooting common problems
Beginners will inevitably run into uneven yarn, over-twist, and breakage. These issues are normal and solvable with small adjustments to technique and attention to material condition.
If your yarn is thick-thin, slow your drafting and pre-draft more uniformly. Lumps often mean inconsistent feeding of fiber or too-rapid twist—practice drafting to a steady thickness before letting twist balance it.
Broken singles usually indicate weak fiber, short staple length, or insufficient twist for the thickness. Increase twist slightly, use shorter drafting lengths, or move to a different fiber until your technique strengthens.
Specific fixes and preventative tips
To stop twist chasing into your hands and creating snarly yarn, use a leader or a lazy kate and maintain even tension during spinning and plying. A small hand tension change has a big effect on twist propagation.
For slippery fibers that refuse to hold twist, try spinning them finer or blending with wool to give the yarn a bite. Combing and aligning fibers for worsted spinning also helps slippery fibers behave more predictably.
When you hit a persistent problem, take a break and examine your setup: is your wheel’s drive band slipping? Is your spindle poorly balanced? Mechanical issues are often the simplest to fix and frequently overlooked by focused spinners.
Starter kit checklist
A clear list helps you avoid overbuying and ensures you have what you need for early success. Start with the essentials and add specialized tools as your interests and needs evolve.
- Drop spindle or beginner spinning wheel
- Prepared roving or top (wool is best to start)
- Small scissors and tape measure
- Lazy kate or holder for plying
- Bobbins or thread for leaders
- Niddy noddy or ball winder for skeining
- Wool wash and basin for finishing
This kit will cover nearly all bases for your first dozen skeins. Add carders, combs, and specialty spindles as you explore different styles and fibers.
Projects to build skills and confidence
Small, fast projects keep motivation high and teach skills efficiently. Make a set of wrist warmers, a hat, or a cowl from handspun singles or two-ply that you can complete in a few evenings.
Begin with accessory-sized projects because they require less yardage and let you learn how your yarn behaves in fabric. As you accumulate experience, try sweaters and shawls where gauge and consistency become more critical.
Consider mixed-media projects—combine handspun with purchased yarn for borders or accents. These hybrids allow you to use precious handspun where it shines and rely on commercial yarn for structure or stability.
Where to learn and buy fiber
Local fiber guilds, fiber festivals, and yarn shops are invaluable for hands-on learning. In-person classes let you correct posture, handedness, and drafting technique under the guidance of experienced spinners.
Online resources are equally useful: video tutorials, forums, and social media groups provide demonstrations and troubleshooting from a global community. Many spinners share short clips that make specific maneuvers easy to see and copy.
For fiber shopping, seek small-scale farms and ethical suppliers if traceability matters to you. Buying directly from shepherds or small mills supports sustainable practices and gives you stories to carry from fleece to finished object.
My first spindle: a personal account
When I first sat down with a spindle, my hands felt clumsy and everything seemed too quick or too slow. The first dozen inches of yarn were uneven, full of thin spots and overly twisted knots, but each mistake taught a specific correction.
After a few weeks of short, concentrated practice sessions, a rhythm emerged. The spindle felt like an extension of my wrist and the fiber answered expectations I hadn’t known I had. That small skein became a bulky hat that still warms me on winter walks.
What remained most surprising was not speed but ownership. That hat carried the memory of countless small decisions—where to draft more, where to add twist, when to stop for a cup of tea—and that narrative is woven into every fiber.
Care and storage of handspun yarn
Proper storage preserves handspun’s quality. Keep skeins away from direct sunlight and humid basements; a cool, dry closet is ideal. Cotton and linen yarns tolerate a bit more structure, while wool benefits from a breathable container like a muslin bag.
To reduce moth risk, store wool with natural repellents like cedar blocks or lavender sachets, but avoid direct contact between cedar and yarn if cedar oils might stain. Periodic airing also helps maintain freshness.
Label your skeins with fiber content, yardage, and date spun. These notes are invaluable months later when you want to recreate a yarn or remember how you washed and finished it for a specific project.
Next steps: how to progress beyond basic yarn
Once you can reliably make a balanced two-ply, expand into texture: chain-plied yarns, art yarns with slubs and beads, and Navajo plying for long color repeats. Each new technique adds expression to your work and opens novel project possibilities.
Pair spinning with dyeing or breed-specific fleece exploration to tune color, texture, and story. Small experiments—dye a handful of roving, spin a short tube with core-spun structure—teach more than long lectures ever could.
Join a spinning circle or a guild challenge to set goals and receive feedback. Community pushes you to try techniques you wouldn’t attempt alone and gives you a network for trading fiber, tools, and advice.
Resources: books, online communities, and classes
Quality books and online courses structure learning and provide reference when you need it. Look for respected authors and teachers with clear photos and patterns for spinning techniques and finishing methods.
Online communities—Ravelry groups, spinning subreddits, and Facebook guilds—offer immediate feedback and a steady stream of ideas. These communities are also places to find local meetups and skill-sharing days.
Workshops at festivals or fiber retreats accelerate progress because they combine intensive practice with expert critique. If you can attend a two-day class with a skilled teacher, you’ll likely save months of trial-and-error.
Putting it all together in a first project

A good first project balances ambition with practicality. Choose a simple pattern for a hat or cowl, estimate yardage conservatively, and spin several small skeins to practice consistency before committing to full yardage.
Make a practice skein for your gauge swatch, wash and measure it, and then spin the amount you need plus a bit extra for safety. Keep notes on WPI, TPI, and fiber prep so you can repeat or adjust for subsequent projects.
When you knit or crochet with your yarn, treat the first few rows as a live lesson: observe how the fabric behaves, whether it springs back, and how edges curl. Those observations will inform your next spinning session and help you refine technique.
A final stitch
Spinning your own yarn is a slow craft that rewards attention and curiosity. Start small, be generous with practice, and treat mistakes as information rather than failure. Over time, your hands learn a vocabulary of movements that turn raw fiber into something warm, useful, and personal.
That relationship between maker and material is the real payoff: every skein carries a piece of time you invested and a set of choices you made. Keep spinning, keep experimenting, and enjoy the gentle alchemy of turning fleece into yarn.


