Cross-stitch is one of those crafts that looks deceptively simple until you try it—and then it becomes unexpectedly absorbing. Whether you want to make a quick sampler to hang in your kitchen or a framed heirloom, learning the basics of patterns and kits will save time and frustration. This guide walks you from the first confused glance at a chart to a finished piece you can be proud of.
Why cross-stitch is worth your time
Cross-stitch sits in a comfortable middle ground between fast crafts and long-form fiber arts. Projects can be completed in a single weekend or stretched into months, depending on your ambition. That flexibility means it’s forgiving for busy people and satisfying for those who love slow, mindful work.
The craft also rewards precision in a very visual way: tidy stitches and consistent tension produce crisp shapes and readable designs. That clarity encourages steady improvement—small changes in technique show up quickly, which makes learning feel instantly gratifying. If you enjoy making things that both look good and can be used or displayed, cross-stitch is a strong choice.
Beyond the finished object, cross-stitch offers practical benefits. It’s portable, low-mess, and inexpensive to try, and it builds hand-eye coordination and concentration. For me, it became a calming evening ritual; stitching helped me unwind while still letting me see tangible progress after each sitting.
What you’ll need to get started
You don’t need a closet full of supplies to begin—just a few basics and a pattern or kit. The right small kit can introduce you to materials and techniques without overwhelming choices. Over time you’ll add tools and different fabrics, but the starter set can be very modest and still let you produce something beautiful.
Spend a little time learning the names of things: Aida, evenweave, DMC, stranded cotton, tapestry needle, hoop, and chart. Those words will recur on labels and in tutorials, and once you recognize them you’ll shop with confidence. Below I break the essentials into manageable categories so you can assemble a starter set with ease.
Fabric types and counts
Aida, evenweave, and linen are the common fabrics. Aida is the friendliest for beginners: its visible grid makes counting simple and reduces mistakes. Evenweave and linen give a finer, more subtle look but require more attention because the holes are less obvious.
Fabric “count” refers to the number of stitches per inch. Typical counts are 14, 16, 18, and 22. A 14-count Aida is standard for beginners because it balances readability with detail; each cross is large enough to see without magnification. Higher counts provide smoother-looking images but are harder on the eyes and hands.
| Fabric | Common counts | Best for |
|---|---|---|
| Aida | 11, 14, 16 | Beginners, simple projects, large motifs |
| Evenweave | 25, 28 | Detailed work, even texture, smaller motifs |
| Linen | 28, 32 | Heirloom pieces, delicate shading, advanced stitchers |
When you buy a kit, fabric choice is usually matched to the pattern’s size and detail. If you select a pattern and fabric separately, use the chart’s recommended count to avoid surprises in finished dimensions.
Threads and floss
The vast majority of cross-stitch uses stranded cotton floss, and DMC is the most widely available brand. Floss comes in skeins with six strands; patterns typically call for two strands over Aida, but that varies. Learning to separate strands neatly is a small skill that greatly improves stitch appearance.
Color keys in patterns reference floss numbers, so buy by number rather than by eye. If you prefer a softer, matte finish, some brands offer mercerized or hand-dyed alternatives that change the look subtly. For beginners, sticking with a reliable brand simplifies color matching and replacement.
Needles, hoops, and frames
Tapestry needles have blunt tips that slide between fabric threads without splitting them; size 24 and 26 are common for 14-count and 16-count Aida, respectively. Use the largest needle that passes comfortably through your fabric and carries two strands of floss without cramping them.
Hoops and frames keep fabric taut while you stitch. A basic wooden or plastic hoop works fine for small pieces, while larger projects may benefit from a Q-snap or scroll frame. Hoops can leave a faint crease if left clamped for a long time, so use them for working and remove them while storing to avoid impressions.
Understanding patterns and charts
Patterns are simply maps of stitches. They use symbols to represent colors and sometimes lines or shapes to indicate backstitching, specialty stitches, or beads. Learning to translate a chart into stitching is mostly about practice and learning a few consistent conventions.
Charts can be black-and-white with symbols or full-color. Both types carry the same information; colored charts are easier to read at a glance, but symbol charts remain preferred for clarity when several similar hues sit next to each other. A key that pairs symbols to floss numbers is your roadmap.
Symbols, colors, and the key
The key lists every symbol used on the chart, the floss number, and usually the suggested number of strands. Keep a physical copy of the key near your work, or photograph it on your phone for quick reference. When symbols repeat, the corresponding color repeats on the fabric, so accurate counting matters.
Some kits include printed fabric with the design stamped or printed directly onto it. These are easier for absolute beginners because you stitch over lines rather than count. The trade-off is that printed pieces rarely offer the same crispness as counted work, and they discourage learning to read a chart.
Full stitches, backstitches, and fractional stitches
Most cross-stitch comprises full cross stitches: two diagonal stitches that form an X. Backstitching outlines shapes and adds fine detail; it’s usually done with one strand and works in straight lines. Fractional stitches (quarter and half stitches) let you create curves and smoother edges but require more attention to placement.
Patterns will indicate backstitches with solid or dashed lines and fractional stitches with special symbols. Don’t skip backstitching just because it feels like extra work; it often brings a pattern to life by clarifying edges and facial features in figurative designs.
Counted patterns versus stamped or printed fabric
Counted cross-stitch requires you to find a center point and count squares, placing stitches according to the chart. It offers precision and flexibility for sizing and placement. Stamped fabric prints the design on the cloth, letting you follow outlines without counting, which can be faster but offers less control over the finished look.
If you want to learn transferable skills, start with counted patterns. Counting teaches you spatial reasoning and reduces dependence on pre-printed guidelines. If your goal is quick gratification or if eyesight makes counting difficult, a stamped kit can be a satisfying alternative.
Kits versus standalone patterns: making the choice
Kits bundle fabric, floss, needles, a chart, and often a hoop, so they’re convenient and beginner-friendly. Standalone patterns offer more variety and sometimes better artistic quality, but they require you to gather materials and interpret the chart without guided supplies. Both paths lead to the same destination—beautiful stitching—but your starting preferences will determine which route fits you.
Kits are great learning tools because they ensure color matching and include instructions tailored to the design. On the other hand, buying separate supplies lets you choose brands, swap colors, and experiment with fabrics. If you plan to stitch regularly, having the flexibility to mix and match materials becomes valuable.
- Pros of kits: convenience, matched materials, guided instructions.
- Cons of kits: limited customization, sometimes lower thread counts or simplified charts.
- Pros of patterns only: broader selection, ability to customize fabric and floss.
- Cons of patterns only: extra shopping, potential for mismatched colors if you’re inexperienced.
For a first project, I recommend a mid-priced kit from a reputable brand—it removes guesswork and delivers a complete, manageable experience. Once you’ve completed a couple of kits, you’ll be ready to buy separate patterns and make more tailored choices.
Choosing your first project
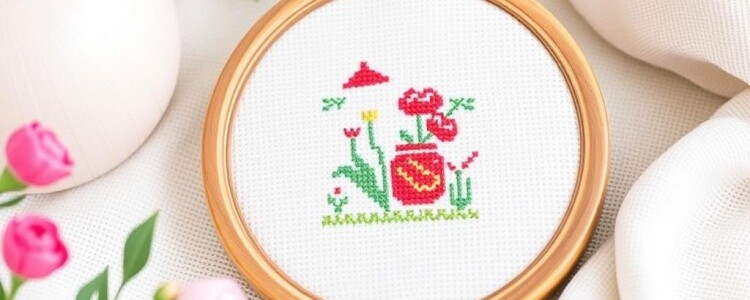
Select a pattern you genuinely want to stitch; motivation matters. A design that feels meaningful will keep you coming back during evenings and commutes. For first-timers, pick a model with large blocks of color and simple outlines to practice stitching rhythm without constant color changes.
A good beginner pattern should avoid excessive fractional stitches, intricate shading, and hundreds of color changes. Portraits and photorealistic scenes are better saved for later; start with clear shapes—flowers, simple animals, phrases, or geometric patterns—that read well at 14-count Aida.
How to pick a beginner-friendly pattern
Look for patterns labeled “beginner” or “easy,” and check the stitch count before buying. A pattern under 100 x 100 stitches is a comfortable starting size, producing a finished piece that doesn’t take forever but still uses enough technique to teach you. Review preview images to ensure the finished look appeals to you.
Also consider the palette: a design with 6–12 floss colors is far easier than one with 25–30 shades. Large color blocks let you practice making neat, aligned crosses and handling thread ends. If the pattern includes backstitching, that’s a bonus for learning finishing touches without overwhelming you.
Recommended starter kits and brands
Several reputable brands produce well-balanced beginner kits. Look for suppliers with clear charts, good-quality floss, and readable instructions. Big-name brands often come with DMC floss and pre-cut fabric, which simplifies the process and reduces the chance of ordering the wrong supplies.
My first kit was a small floral sampler from a well-known brand; it used 14-count Aida and only seven colors. The instructions were clear and the finished piece looked much better than I expected, which encouraged me to try a larger project soon after. A positive first experience can set the tone for a long hobby.
Basic techniques and workflow
A consistent workflow saves time and keeps your fabric tidy. Set up good lighting and a comfortable chair, decide on a stitching hand (the direction each cross rests matters), and work in small, regular sessions. Over time you’ll find a rhythm that suits your hands and your eye.
Start by finding the center of both the fabric and the chart; most charts mark the center with arrows or a bold line. Stitch outward from the center so your piece is positioned correctly and you don’t run out of space. That central start prevents ugly surprises when framing or finishing.
Starting and securing your thread
There are several ways to start a thread—loop method, waste knot, or anchoring under a few stitches are common. For stranded cotton, fold a length of floss in half and use the loop method when working with an even number of strands; it makes a neat, secure start. For single strands or odd numbers, secure the tail under a few stitches on the back to avoid bulky knots.
Keep thread lengths to around 18–24 inches to prevent fraying and tangles. Long threads twist and collect lint, and they split more frequently. Good habits with thread management make your stitches neater and reduce wasted time untangling snarls.
Working neat crosses
Decide whether to make each full cross (bottom stitch then top stitch) across a row or to complete every bottom stitch across a block and then return for the top stitches. Many stitchers prefer the “row by row” method for speed and consistency because it keeps the tops of all stitches aligned in the same direction.
Maintain even tension; stitches should sit flat but not constricted. If your stitches are too tight, the fabric will pucker; if too loose, the pattern will look sloppy. Aim for a gentle, consistent pull so each cross looks like the others in its neighborhood.
Parking, anchor threads, and color changes
When a pattern calls for frequent color changes, techniques like “parking” threads—leaving a thread tail on the back where it will be used again—can save time. Parked threads reduce repeated tying and trimming, but keep organized so the back doesn’t become a tangled mess. Use bobbins or labeled cards to sort and store floss.
Anchor long color runs at the back carefully; weave the tail under several stitches to secure it without knots. Trimming tails too short risks unraveling; leaving them too long creates bulk. I usually leave a tail about half an inch and weave it under three to five stitches, which balances security and neatness.
Finishing touches: backstitching and embellishments
Backstitching sharpens details and brings definition to eyes, mouths, and borders. Do it with a single strand for subtlety or two strands for bolder outlines; test on a scrap to judge contrast. Be patient—backstitching is slower than crosses but transforms the image dramatically.
Beads, metallic threads, and French knots add texture but complicate the process. Save them for a second project or try a small area on a larger piece to learn the technique. Specialty threads often require different needles and handling; read instructions or tutorial videos before attempting them.
Common problems and simple fixes

Everyone miscounts or twists a stitch occasionally—it’s part of learning. The trick is to catch errors early by checking your work regularly. Turning over the fabric to inspect the back gives you clues: tidy backs usually mean tidy fronts, while long stray threads or running stitches warn of counting mistakes.
If you discover a mistake far into the project, resist the urge to panic. Unpicking stitches is annoying but straightforward with patience. Use a small seam ripper or a fine pair of scissors to pick out stitches carefully, and work from the back when possible to avoid cutting the fabric. Slow, deliberate removal minimizes holes and distortion.
Blended colors or subtle shading can look muddy if similar tones are placed incorrectly. If a transition seems off, try substituting one color for a slightly lighter or darker floss; small swaps achieve big improvements. When in doubt, consult online forums or pattern designers—often a quick photo shared with a community produces helpful suggestions.
Washing, blocking, and framing your piece

Finishing a piece properly preserves it and improves presentation. Start by gently washing the finished embroidery to remove oils and dirt. Use lukewarm water with a mild detergent, swish gently, and avoid wringing; let the piece soak briefly and rinse thoroughly to remove soap residue.
Drying and pressing are essential. Lay the piece face down on a folded towel, press lightly with another towel on top to remove excess water, and then air dry flat. To remove remaining wrinkles, iron on the fabric’s reverse side with a pressing cloth, or steam lightly from above if the design includes metallic threads that might flatten.
- Finishing supplies: acid-free mounting board, framing tape, backing board, and UV-protective glass if displaying in bright light.
- Mounting: center the piece on acid-free board and use lacing or tape to secure the edges for a professional look.
- Framing: leave a small gap between fabric and glass to prevent condensation and crushing of stitches.
Professional framing yields long-term protection but can be pricey. For a home solution, choose a deep frame or float the fabric on a padded mount. If you want to wash and re-frame later, secure the fabric in a way that allows safe removal, such as lacing rather than gluing.
Where to find patterns, kits, and inspiration

Patterns are available everywhere: independent designers sell PDF patterns on marketplaces, big brands offer printed kits, and social media hosts countless free designs. Libraries and thrift stores sometimes have vintage patterns that are charming and offer a peek at historical styles. Explore a variety and you’ll discover the voices and aesthetics that resonate with you.
Online shops and marketplaces provide instant access and user reviews. Sites like Etsy host independent designers with unique artwork, while major craft retailers stock dependable kits. For free patterns, search reputable blogs and designers who offer sampler projects as introductions to the craft.
Software and digital tools for stitchers
Programs like PCStitch and PatternKeeper let you view, zoom, and track progress on digital charts, which is handy for large projects. Some mobile apps let you color-code and “x out” completed areas, which can reduce counting errors. If you enjoy customizing, pattern software can convert images to cross-stitch charts, though such conversions often need manual tweaking for good results.
Remember that digital conveniences don’t replace basic skills; learning to read a paper chart remains valuable. I use an app to mark completed areas on particularly busy charts, but I still print patterns when I know I’ll need to reference them frequently or share them with friends at stitch nights.
Communities, classes, and continuing your skills
Joining a stitch group or online forum accelerates learning and keeps you motivated. People generously share tips for color substitutions, finishing techniques, and kit recommendations. If you enjoy company while stitching, find a local guild or a casual meetup—many cities have weekly or monthly gatherings where stitchers of all levels trade ideas and show progress.
Workshops and classes are especially useful for specialty techniques like silk shading, hardanger, or goldwork. Even a single afternoon with an experienced teacher can demystify a technique that seemed inaccessible. Check local craft stores, community centers, or fiber festivals for classes tailored to various skill levels.
Progressing beyond the beginner stage
After a few simple patterns you’ll likely crave more complexity: finer fabrics, blended threads, low-light colorwork, and specialty stitches become appealing. Tackle one new technique per project to keep frustration low and achievement high. For example, add backstitching to a simple piece, then try a project with fractional stitches next.
Experiment with palette swaps to customize designs for gifts or home decor. Substituting a thread color or changing fabric color can transform a pattern’s mood. Keep notes of substitutions and fabric counts so you can reproduce or tweak your approach on future projects.
As your skills grow, consider designing your own simple charts. Many stitchers find creating patterns is an enjoyable extension of the craft—an opportunity to translate photos, logos, or lettering into stitched art. Start with a small motif or monogram and learn to map shapes onto a grid before attempting larger compositions.
Maintaining motivation and avoiding burnout
Cross-stitch should be enjoyable, not a chore. Rotate between small “quick win” projects and one longer piece to keep momentum without overwhelming yourself. Quick wins provide satisfaction and visible progress, while the longer project builds skill and endurance.
Set modest daily or weekly goals rather than aiming for marathon sessions. Five or ten minutes a day adds up and keeps your hands in practice. Treat your stitch time as relaxing and productive; the combination is what keeps many stitchers returning night after night.
Finally, celebrate finished pieces. Frame, gift, or photograph your work. Sharing progress with friends or an online community provides encouragement and a sense of completion that helps prevent unfinished-objects piling up.
There’s no single right way to start—only the next small stitch. Try a modest kit, learn a few essential techniques, and allow curiosity to lead you into more detailed work. Along the way you’ll pick up tricks that make projects faster and cleaner, and you’ll build a modest stash of tools and threads that multiply your creative possibilities. Enjoy the rhythm, the tiny victories, and the quiet satisfaction of turning thread and cloth into something you can hold and share.


