There’s something quietly magical about a tree hung with ornaments you made with your own hands and your loved ones’ laughter in the background.
Whether you’re chasing cozy winter afternoons or searching for a low-tech antidote to screens, crafting ornaments together turns holiday prep into its own kind of celebration.
In this guide I’ll walk you through practical projects, setup tips, safety pointers, storage strategies, and ways to make every ornament carry a story — all grounded in real experience from my family’s messy, joyful workshops.
Why family-made ornaments matter
Handmade ornaments do more than decorate a tree; they capture a moment in time — a toddler’s palmprint, an awkward school photo, a new recipe’s salt-dough star that survived the oven.
When families craft together they exchange memories along with glue sticks and paintbrushes, creating heirlooms that are inexpensive but emotionally rich.
I’ve watched a simple project become a ritual in my own home: a stack of mismatched materials pulled out every December, and each year an argument over who gets to hang the newest piece at the very top.
Setting goals and choosing projects
Begin by asking what you want from the session: quick activities to occupy kids, or intricate keepsakes to save? Your goal will shape the materials, time, and level of mess tolerated.
Pick projects based on participants’ ages and attention spans. Young children might need 15–30 minute crafts, while teens and adults can handle multi-step assemblages that take an afternoon.
Plan a mix of short and long projects, so everyone finishes something satisfying; follow up with one collaborative piece that becomes the household ornament for the year.
Essential supplies and a simple materials table

A basic stash lets you pivot mid-session without running out to the store: glue, scissors, string, paint, a few craft knives for adults, and a variety of fillers like beads, sequins, and fabric scraps.
Below is a compact table that pairs materials with recommended ages and typical uses to simplify planning.
| Material | Recommended ages | Common uses |
|---|---|---|
| Washable glue | All ages | Paper, felt, lightweight assemblies |
| Salt dough | 5 and up (with oven help) | Handprint ornaments, stamped shapes |
| Acrylic paint | 6 and up | Painting wood, clay, and glass (adults supervise) |
| Felt and needle/thread | 8 and up (adult help for small needles) | Stuffed ornaments, applique |
| Clear glass or plastic baubles | All ages (plastic safer) | Fill with glitter, small photos, or confetti |
| Hot glue gun | Adults only | Quick attachments and mixed-material builds |
Keep a small “repair kit” on hand: clear-drying glue, spare hooks, extra ribbon, and a tiny sewing kit to rescue fragile favorites later.
Safety and prep for little hands
Child safety isn’t just about adhesives and scissors; it’s also about scene setting. Cover tables with newspaper, have a washable smock for paint, and pick non-toxic materials whenever possible.
Set age-appropriate task stations: toddlers get stickers and pre-cut shapes, school-age kids operate with blunt-tipped scissors and paint pens, and teens may take on sewing or heat-based finishes under supervision.
Never leave small parts unattended around very young children, and teach simple safety rules — where to put scissors, how to handle hot glue, and washing paintbrushes in the sink immediately after use.
Organizing the crafting space
Create clear zones: one for cutting and assembly, another for painting and drying, and a third for glitter or particularly messy materials. This reduces cross-contamination and helps kids know where to go next.
Use shallow trays or muffin tins to portion beads, sequins, and small items; these keep small components contained and easier to pick up if spilled.
Play soft music, have a timer for transitions, and set a visible drying spot so completed pieces don’t get smudged or stepped on during the rest of the festivities.
Quick projects for restless kids

Short attention spans respond well to instantaneous satisfaction. Choose crafts that finish in one sitting and don’t require complicated drying steps.
My go-to rapid projects are paper snowflakes, foam stickers on pre-cut shapes, and cinnamon stick bundles tied with ribbon — each is fast, seasonal, and photo-worthy.
Gather a stack of templates for stars, circles, and trees so younger children can trace and cut without needing to invent shapes on the spot.
Paper snowflakes and folded fun
Paper snowflakes are classic but endlessly variable; swap plain white paper for metallic or patterned sheets to make a unique collection that reflects your home’s personality.
Teach children a simple fold-and-cut method and then hand out decorative punches, glitter glue, or watercolor washes for color and texture.
For extra longevity, laminate favorite snowflakes or spray them with a matte sealant to prevent tearing over the years.
Sticker and foam-tree ornaments
Pre-cut foam shapes are a lifesaver when you want little hands to succeed quickly. Add foam stickers, googly eyes, and a dab of glue for sparkly details.
String a ribbon through a punched hole and label the back with the creator’s name and year — a practice that turns a quick craft into a future keepsake.
These make great classroom or playdate projects because they’re cheap, transportable, and require almost no cleanup.
Salt dough: cheap, tactile, and sentimental
Salt dough is an economical medium that bakes into a durable ornament you can paint and seal. The recipe is simple: two parts flour, one part salt, and one part water; knead until smooth.
Press in handprints, cookie cutters, or leaves for impressions. After baking and cooling, paint with acrylics and seal with a clear craft varnish for longevity.
My family stamps the year and a short note on the back before sealing — it’s a small act that makes each piece a time capsule you’ll rediscover for decades.
Step-by-step for salt dough stars
Roll dough to about 1/4 inch thick, cut stars with a cookie cutter, and use a straw to make a hanging hole near the top. Bake at 200°F until dry, usually 2–3 hours depending on thickness.
Paint with hotel colors or metallics; for a rustic look, wipe on a dab of brown paint and then wipe most of it away to create an antiqued finish.
Tie twine or ribbon through the hole, and label the back with a permanent marker for future reminiscing.
Photo and memory ornaments
Turning photos into ornaments makes holiday décor deeply personal and a little nostalgic. Use clear plastic globes, small frames, or wood discs to display faces and memories.
Scale and crop photos so the focal point is centered when displayed. Add a badge with the year or short caption to make identification easy years later.
My sister began a tradition of inserting her child’s first-school picture into a clear bauble each year, and now the family laughs at hairstyles while tracing a child’s growth across the tree.
Making a simple photo bauble
Print a small, circular photo sized to the bauble’s diameter, roll it gently, and insert it into a clear plastic ornament. Add fine glitter, confetti, or tiny fake snow and reseal the cap.
For a more durable option, glue the photo to a wooden disc and coat it with decoupage medium or clear resin to protect against moisture.
Attach ribbon and a handwritten tag with the year; these ornaments make excellent travel-friendly gifts for grandparents.
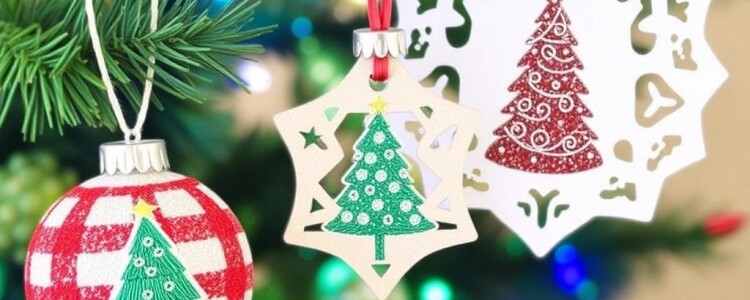
Painted wooden ornaments: a canvas for creativity
Pre-cut wooden shapes are sturdy and paint-friendly, offering a smooth surface that takes acrylics and ink well. They arrive in craft stores in bulk and are easy to store for future seasons.
Combine stencils, sponging techniques, and metallic leafing to elevate simple forms into elegant decorations that still feel homemade.
We once painted a set of wooden birds as a family project; each bird took an individual color palette, and the mismatched flock looked better on the tree than anything store-bought could match.
Techniques for neat painting
Use a base coat to reduce visible wood grain, then add stenciled patterns with a sponge or a small brush. Finish edges cleanly with a scrap of foam or a steady hand.
Seal painted pieces with a clear polyurethane for protection. If you want a softer, handmade look, select a satin finish rather than high-gloss.
Drill holes for hanging before painting to avoid cracking paint around the drill point afterward.
Felt and sewn ornaments for gentle hands
Felt is forgiving: it doesn’t fray and comes in bright colors. Small hand stitches, a sprinkle of stuffing, and a dash of embroidery can create charming, durable keepsakes.
Projects can be as simple as two felt circles sewn together with a running stitch, or as intricate as layered appliqué scenes with bead accents.
When the kids were older we had a felt ornament weekend and produced a line of miniature storybook animals that now hang in a special corner of the tree each year.
Beginner sewing projects
Start with a simple heart or star. Cut two identical shapes, blanket-stitch them together leaving a small gap, stuff lightly with polyester fill, then finish stitching and add a hanging loop.
For variety, glue on buttons, tiny bells, or a strip of ribbon. Use embroidery floss for stronger stitches and a more decorative look.
If needles are a concern for small children, use pre-punched felt kits with plastic needles and thicker yarn to practice hand stitching safely.
Glass and plastic globe fillings
Clear ornaments are like tiny snowglobes: inside you can nestle dried flowers, confetti, miniature scenes, or a child’s folded drawing for a whimsical surprise.
Plastic globes are an excellent option with younger kids because they’re unbreakable, while glass adds fragile elegance if handled by adults.
We once filled globes with tiny LEGO scenes and sealed them — the novelty of finding a tiny world inside a bauble made them a hit with cousins of all ages.
Design ideas for globe fillers
Try layering in sequins, miniature paper trees, or a strip of film with tiny photos glued around the interior. A few drops of glycerin mixed with water will make loose glitter fall like snow if you want a shakeable effect.
Secure everything with a dab of clear glue at the base to prevent shifting, especially if ornaments will be shipped or handled by active children.
Label the cap with the year or a tiny ribbon tag to help future holiday unpacking feel like opening a present from the past.
Eco-friendly and upcycled ornament ideas

Repurpose old sweaters into stuffed mittens, slice corks for stamped ornaments, or transform vintage holiday cards into layered paper baubles.
Upcycling stretches a small budget, reduces waste, and adds a tactile history to your décor, since many materials already carry their own story.
At one family workshop we sliced a stack of worn denim into braided rings and decorated them with buttons; the result was a cozy garland that smelled faintly of home sewing and laughter.
Quick upcycle starters
- Use bottle caps as the base for tiny photos or mosaics.
- Turn old jewelry into ornament bling by wiring charms onto a ring.
- Cut magazine pages into strips and roll them into beads for a colorful chain.
These starters require minimal specialized tools and can be adapted to whatever you have at hand, making them ideal for spontaneous craft nights.
Advanced techniques and heirloom projects
If you want ornaments that can be passed down, consider learning a few advanced skills: needle-felting, glass etching, polymer clay sculpting, or resin casting.
These methods take longer and require specific tools, but they reward patience with highly personalized, archival-quality pieces.
I tried resin casting one year to preserve tiny wildflower bouquets; the process took an afternoon and a couple of careful pours, and the finished pieces still gleam like preserved summer in December.
What to expect with resin and casting
Resin gives a crystal-clear finish that’s excellent for embedding photos, fabric, or plants. Work in a well-ventilated area, measure carefully, and budget curing time of 24–72 hours.
Use silicone molds for clean releases, and consider tinting the resin subtly for a stained-glass effect. Resin projects are excellent for adults or teens ready to follow precise steps.
Keep a small stash of gloves and mixing cups devoted to resin work so you don’t accidentally contaminate food or other projects.
Personalizing ornaments with stories and dates
Every ornament becomes more valuable with context. Add initials, a year, or a short sentence on the back to turn a trinket into a memory anchor.
Consider attaching a tiny card to the loop with a single sentence about the moment — where you were, who was there, what made that season special.
Our family writes a short anecdote on the inside of each new ornament’s box; opening the boxes years later is like reading a holiday scrapbook in three dimensions.
Ideas for recording the story
Stamp or write the year with a permanent pen, stitch initials into felt, or print tiny labels to glue to the back of wood ornaments.
For more elaborate keepsakes, include a short recorded message on a tiny USB token inside a larger ornament or attach a QR code that links to a photo album online.
Small, legible annotations matter; make handwriting neat or use a printed label for readability decades hence.
Storing and preserving your ornaments
Proper storage will protect twelve months of creative effort. Use shallow boxes, acid-free tissue paper, or craft-specific storage containers with individual compartments.
For delicate items, consider wrapping each ornament in soft fabric or bubble wrap and storing them in a cool, dry place to prevent warping or mold.
Label boxes by year or by tree section (top, middle, bottom) to simplify decorating next season and to avoid opening every box to find a single favorite.
Repair tips for ornaments that don’t survive
Keep a small repair kit with clear glue, matching paint, spare hooks, and twine. Many breaks are reversible with patience and the right adhesive.
A chipped painted wood ornament can be sanded, primed, and repainted; a torn salt-dough edge can be filled with a bit of fresh dough, rebaked, and retouched.
Record the original look with a quick photo before you repair something — that helps guide accurate restoration and preserves the original memory if a full repair would erase sentimental marks.
Hosting a neighborhood ornament-making party
Turn crafting into a community event by inviting neighbors for a casual ornament exchange or potluck workshop. Provide templates and shared materials so everyone can participate without stress.
Set up stations for different skill levels and advertise a small supply fee to cover bulk materials. Encourage participants to bring a treat to share and a wrapped ornament to swap.
My local block had a “decorate-and-swap” night that became a winter staple: new neighbors met old hands, kids made friends over glitter, and everyone left with a handful of new decorations and conversation starters.
Checklist for a successful craft party
- Decide the number of stations and skill levels represented.
- Prepare materials kits and a central toolkit with scissors, glue, and tape.
- Label supplies and provide simple instruction sheets for each project.
- Have a drying area and an art-show moment at the end to admire creations.
These small systems keep the night flowing and reduce the frantic shuffle that can occur when everyone works off the same small table.
Budget-friendly strategies
You don’t need expensive supplies to achieve charming results. Dollar stores, thrift shops, and leftover holiday wrap are treasure troves for creative families.
Use household items like pasta shapes, buttons, and bottle caps as ornament components, and encourage kids to see common objects as raw material for art.
We once made a dozen ornaments from leftover wrapping paper and the innards of a broken necklace; they looked deliberately eclectic and felt like an inventive victory.
Troubleshooting common crafting problems
Smudged paint and runaway glitter are typical but solvable. Keep baby wipes and a damp cloth nearby, and assign a “glitter tray” so excess sparkle can be shaken back into storage.
If paint cracks on baked dough, the problem is usually too-thin baking or paint application before the piece fully cooled. Allow pieces to cool and cure thoroughly before finishing.
When things go wrong, use the moment as a teaching opportunity: demonstrate how to repurpose a “mishap” into texture or a new design element.
Making ornaments part of your holiday rhythm
Turn ornament-making into an annual ritual by pegging it to a clear date: the first weekend of December, a sibling sleepover, or the first snowfall. Ritual anchors habit, and habit makes memories repeatable.
Rotate leadership: one year the youngest picks the project, next year an adult introduces a new technique. This keeps the tradition fresh and inclusive.
Over time you’ll notice the ornaments accumulating into a visual history of your family’s tastes, growth spurts, and seasonal priorities — and that is the real treasure.
Gifts, fundraisers, and giving back
Handmade ornaments make thoughtful, low-cost gifts that can also become community fundraisers. Host a small market where kids sell their creations for a charity of their choice.
Encourage children to choose the cause and help set prices to teach basic financial literacy and civic responsibility while they share their art.
One December our neighborhood youth group sold simple painted wooden ornaments and used the proceeds to buy warm blankets for a shelter; the kids learned the joy of giving in a direct, tangible way.
Wrapping up a successful crafting season
After the last glitter has been swept and the table folded away, store a simple “After Action” note with your materials for next year: what worked, which projects fizzled, and which supplies ran out first.
Preserving these notes in your ornament box is a small ritual that makes annual planning smoother and keeps the craft night evolving instead of repeating the same hiccups.
Above all, keep the spirit light and the expectations realistic: the point of family ornament-making is connection, not perfection. Years from now you’ll value the story stitched to each piece more than any glossy finish on the surface.


